Zsh + Oh My Zsh + Spaceship prompt
Terminal is a part of your operating system that many average users don’t even know exists. However, if you develop, deploy software locally or remotely, Terminal becomes your everyday tool. Proper tool setup helps you get the job done faster and better.
Here I want to share my settings so that in the future you can quickly set up on a new system, as well as help you do it yourself.
- Zsh — Z shell, is common in many Linux builds and macOS
- Oh-My-Zsh is a tool that allows you to manage Zsh settings in a convenient way.
- Spaceship prompt — flexible command line prompt for any shell!
I hope you have installed Homebrew - a convenient application manager for macOS. Linux’s users have such managers out of the box.
Installing / updating Zsh
Let’s install (update) Zsh.
brew install zsh
Or we will update it if necessary
brew upgrade zsh
If your standard shell was different, replace it
chsh -s $(which zsh)
and restart the shell for the changes to take effect
source ~/.zshrc
You can exit the terminal ⌘+Q and start it again.
Check that you are now using Zsh
echo $0
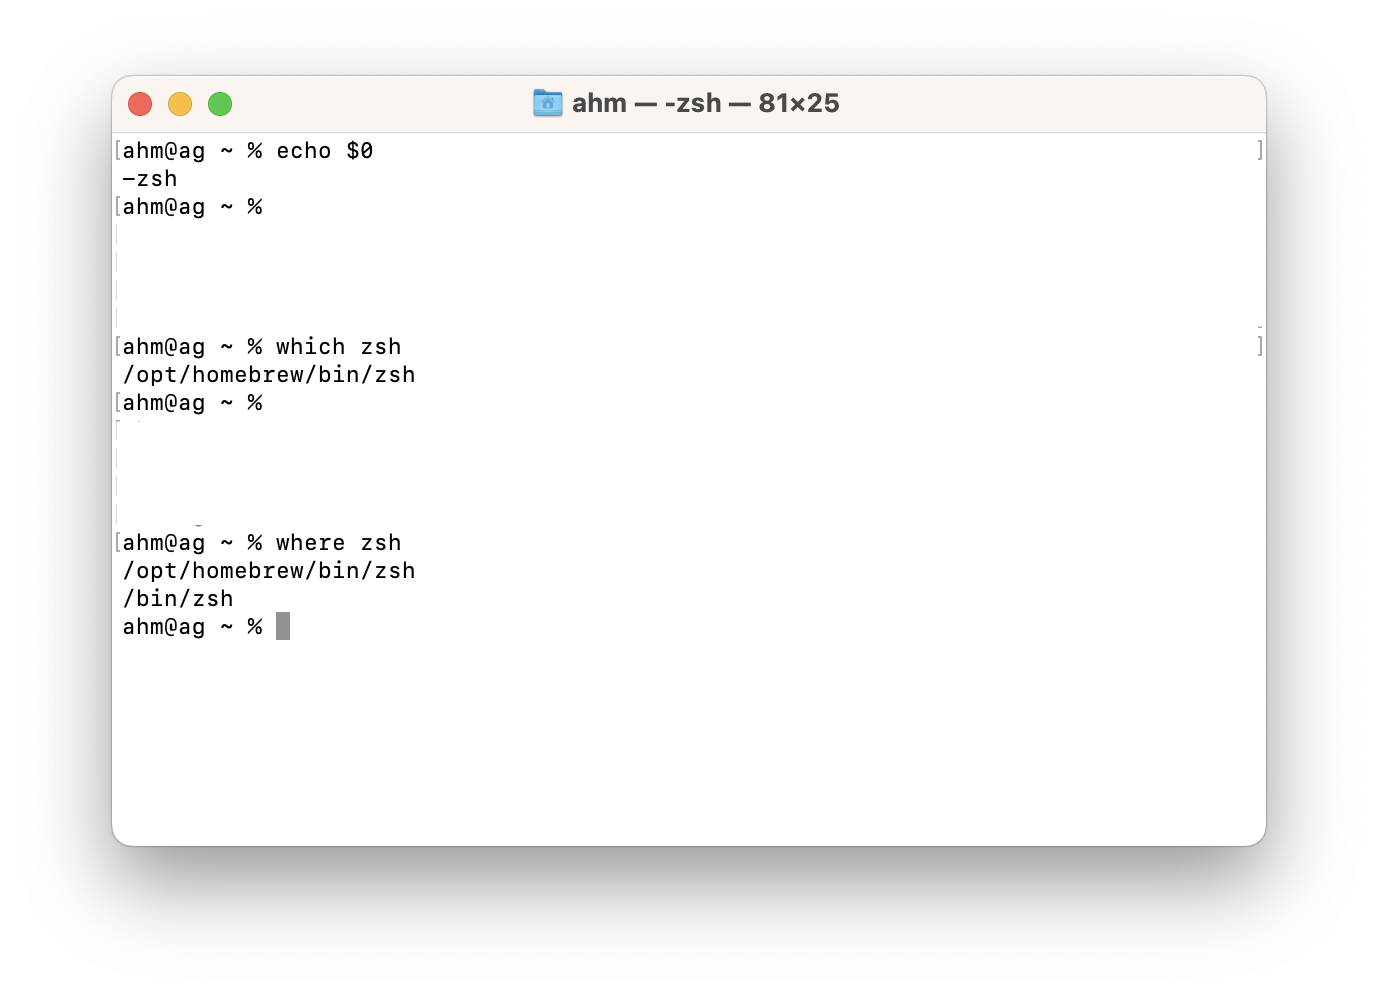
We see that Zsh is also in the header of the terminal window. The which zsh command shows the path to the location of the executable file; where zsh - where all Zsh variants are located.
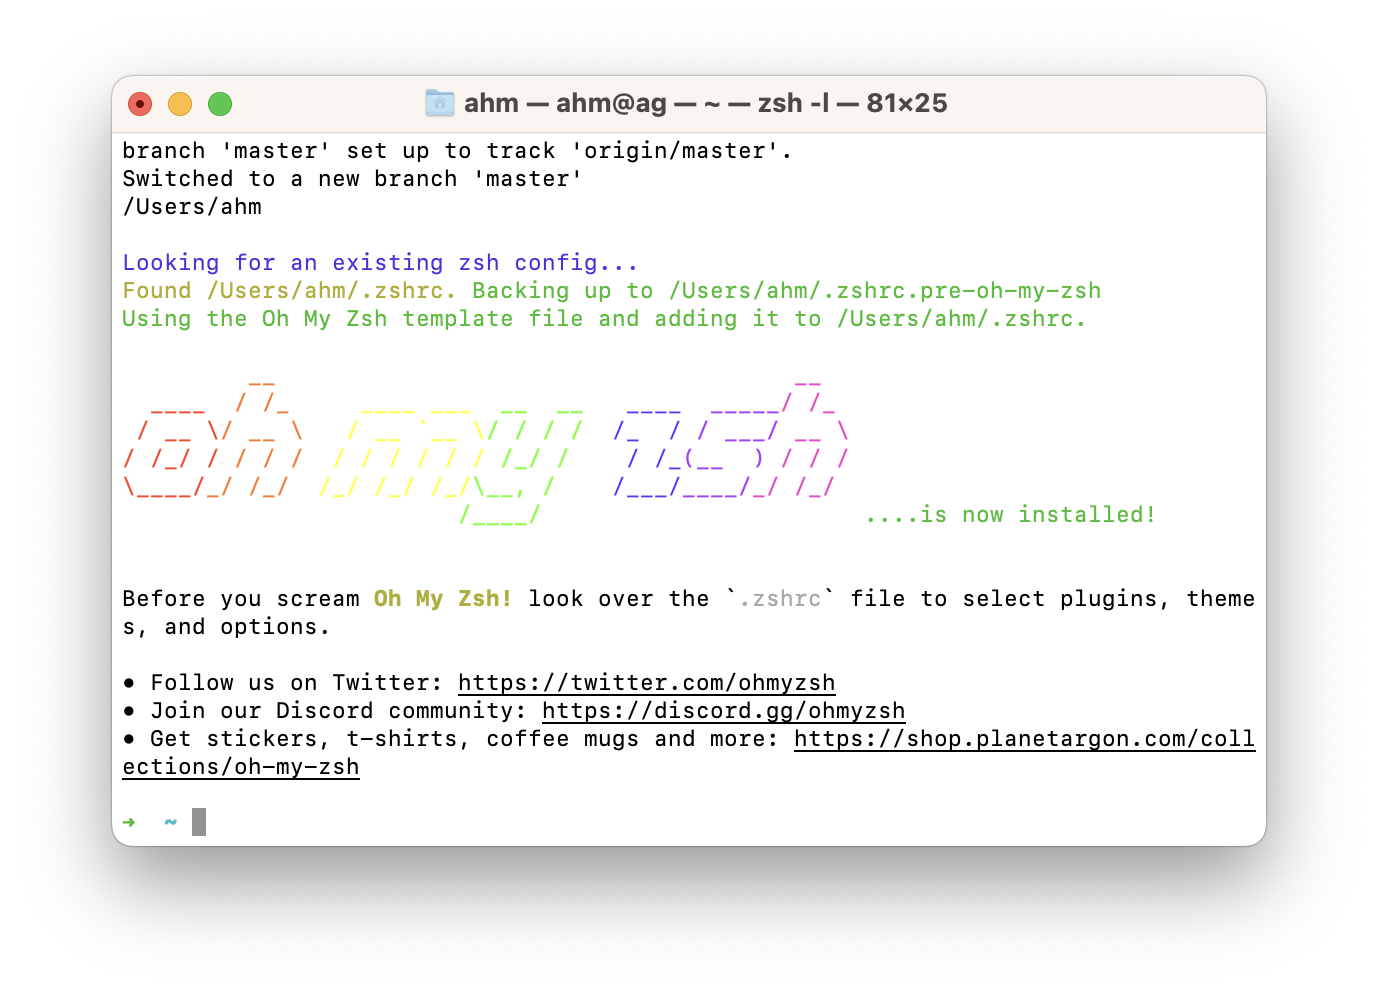
Installing Oh My Zsh
After updating Zsh, let’s proceed to install Oh My Zsh. Oh My Zsh allows you to create a .zshrc configuration file template for Zsh.
https://ohmyz.sh/#install — Contains installation instructions.
sh -c "$(wget https://raw.githubusercontent.com/ohmyzsh/ohmyzsh/master/tools/install.sh -O -)"
If you still don’t have `wget’ like I do, install it
brew install wget
After installing Oh My Zsh, the command line prompt will change to a green tilde “~”. Oh My Zsh will provide you with a template .zshrc settings file where you can customize the behavior of Zsh, enable additional plugins, and customize the appearance of the command line prompt.
Tuning of the ~/.zshrc
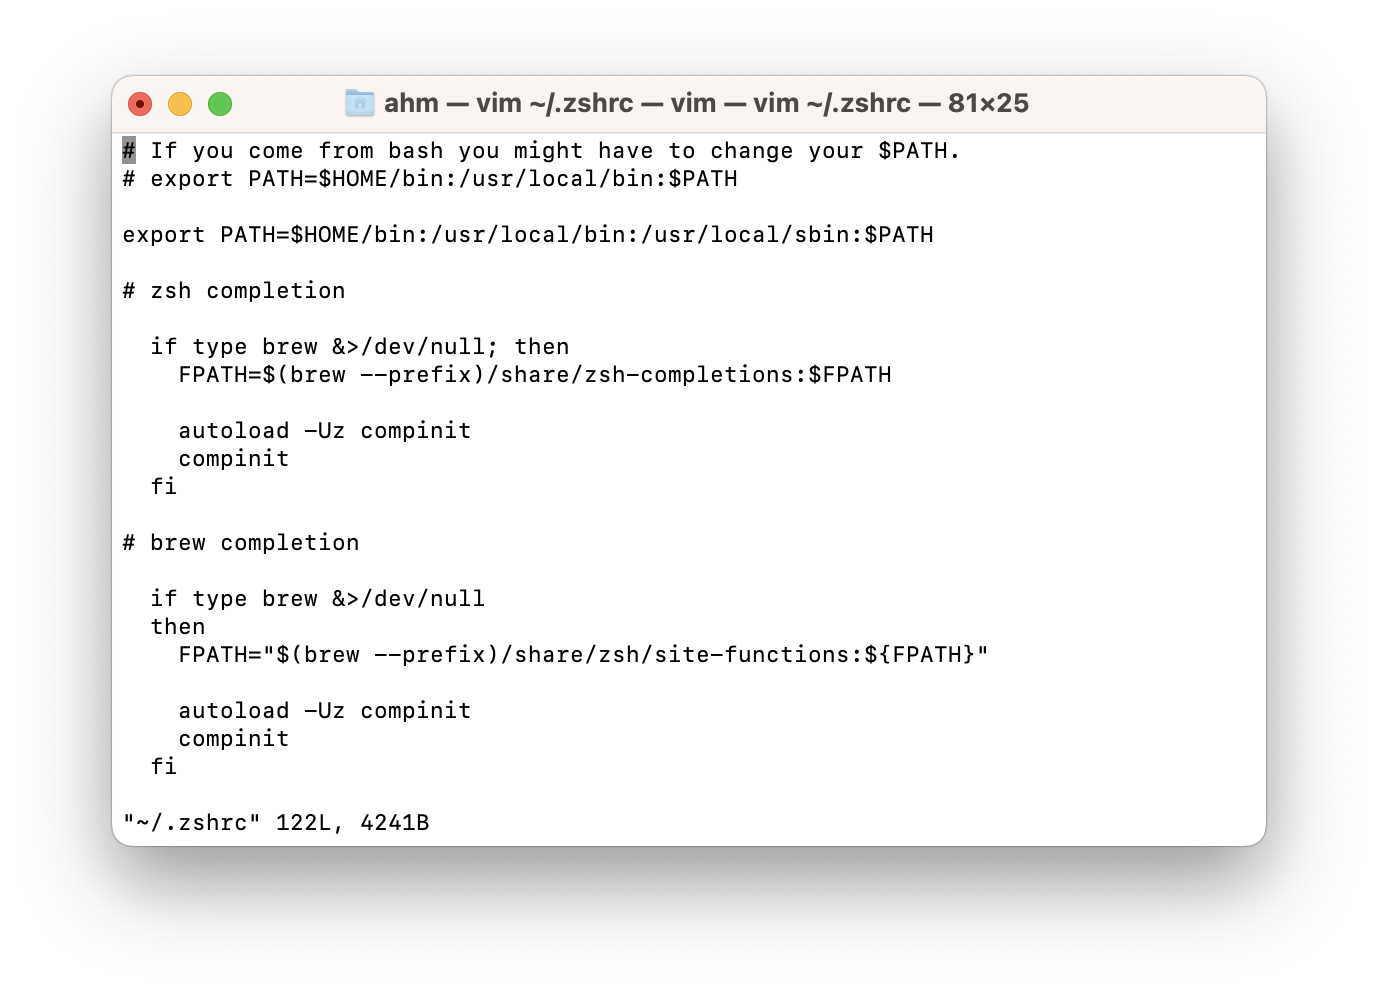
Let’s configure the paths $PATH
export PATH=$HOME/bin:/usr/local/bin:/usr/local/sbin:$PATH
Let’s add autocompletion for commands by installing `zsh-completion’.
brew install zsh-completion
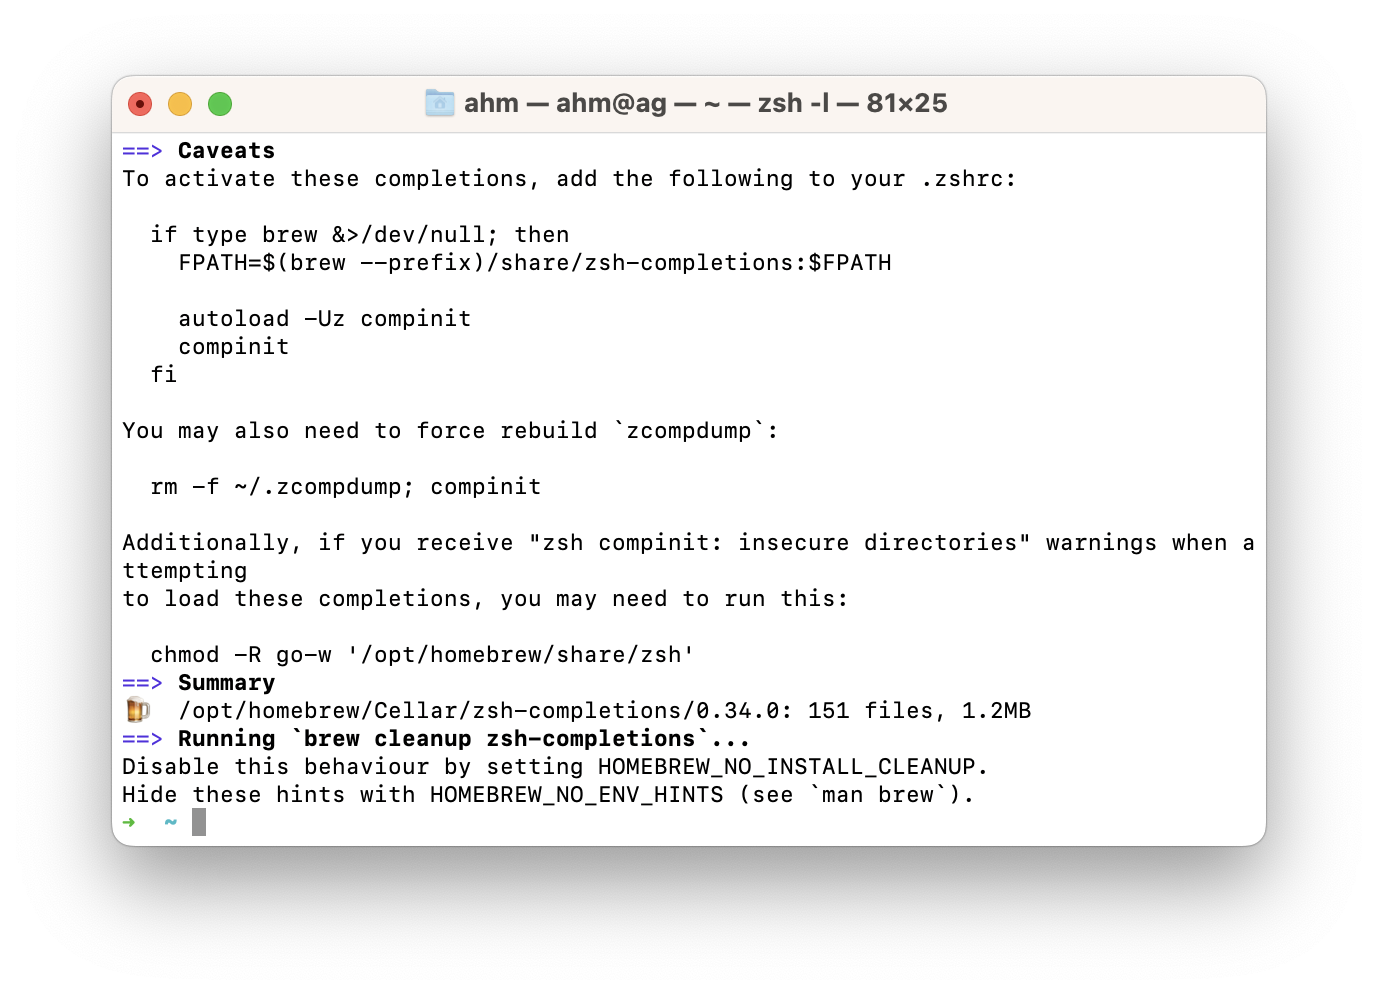
According to the advice, add the following code to ~/.zshrc to enable auto-completion of commands in the terminal.
  if type brew &>/dev/null; then
    FPATH=$(brew --prefix)/share/zsh-completions:$FPATH

    autoload -Uz compinit
    compinit
  fi
Perform a forced cleanup of `zcompdump’.
rm -f ~/.zcompdump; compinit
However, we have a problem when trying to initialize the code for autocompletion of "zsh compinit: insecure directories" commands, execute the command from the installer instructions:
chmod -R go-w '/opt/homebrew/share/zsh'
But still, when trying to initialize the autocompleter, we receive a message about insufficient rights
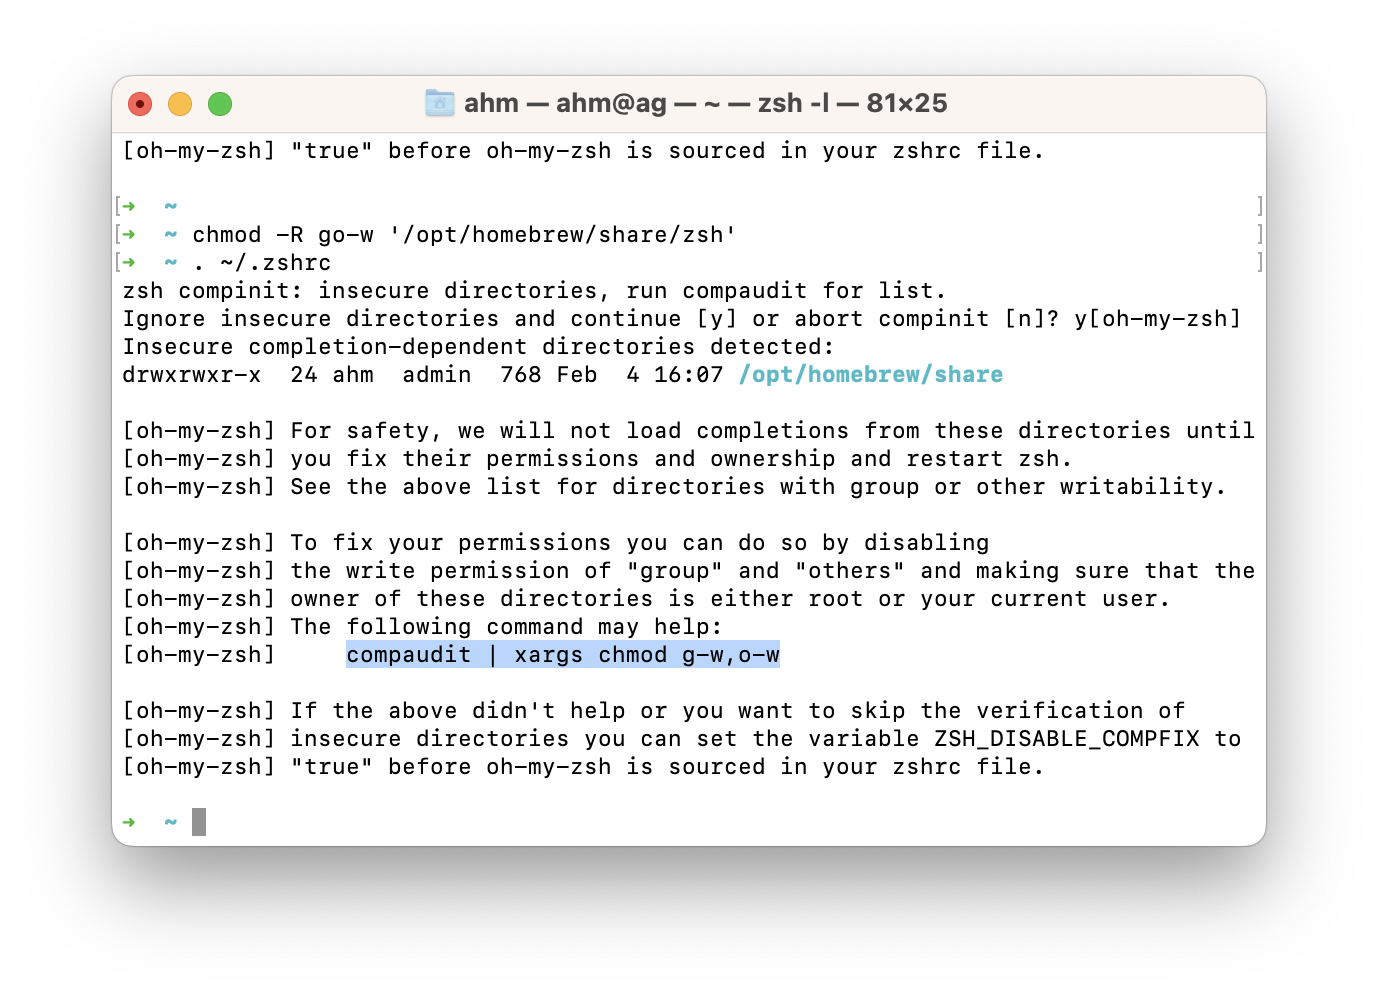
execute the command to grant the appropriate permissions
compaudit | xargs chmod g-w, o-w
and reload ~/.zshrc. Now everything seems to be working as expected, at least we don’t have any error messages or missing permissions.
Now let’s add autocomplete commands for Homebrew
  if type brew &>/dev/null
  then
    FPATH="$(brew --prefix)/share/zsh/site-functions:${FPATH}"

    autoload -Uz compinit
    compinit
  fi
This is what it looks like in ~/.zshrc.
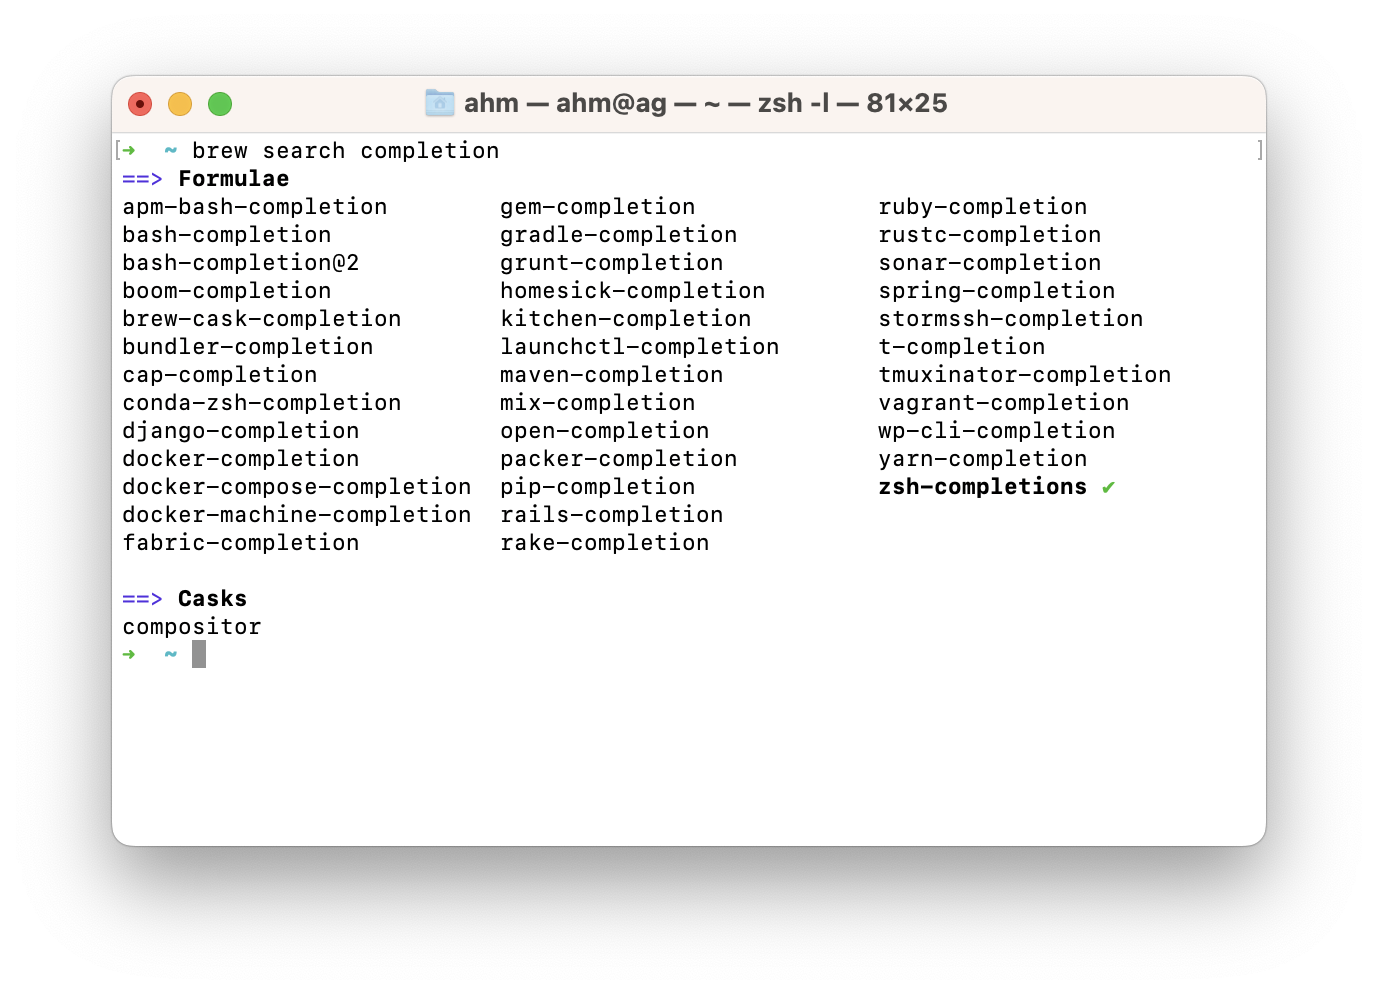
To set up autocomplete for other commands, search for them via
brew search completion
and follow the instructions to add them to ~/.zshrc.
Add other path settings for Ruby, Python, Java, nvm, and more before the Oh My Zsh initialization section.
# Path to your oh-my-zsh installation.
export ZSH="$HOME/.oh-my-zsh"
Syntax highlighting
We install pygments to highlight the syntax of the command
brew install pygments
and add to ~/.zshrc
ZSH_COLORIZE_TOOL=pygmentize
ZSH_COLORIZE_STYLE="default"
before the plugins section.
Plugins
Plugins are used to add additional functions to Oh My Zsh. My choice:
plugins=(
        git
        nvm
        colored-man-pages
        colorize
        zsh-syntax-highlighting
        zsh-autosuggestions
        zsh-aliases-lsd
)
For colorize we set pygments, and for zsh-aliases-lsd we set
-
lsdis a replacement for the standardlscommand, allowing colored output, file and folder icons, and more, see https://github.com/Peltoche/lsd for details.brew install lsdAdd plugin into Oh My Zsh
git clone https://github.com/yuhonas/zsh-aliases-lsd.git \ ${ZSH_CUSTOM:-~/.oh-my-zsh/custom}/plugins/zsh-aliases-lsd -
zsh-syntax-highlighting— provides syntax highlighting.Installation
git clone https://github.com/zsh-users/zsh-syntax-highlighting.git \ ${ZSH_CUSTOM:-~/.oh-my-zsh/custom}/plugins/zsh-syntax-highlighting -
zsh-autosuggestions— provides prompts when typing commands, making typing much easier.git clone https://github.com/zsh-users/zsh-autosuggestions \ ${ZSH_CUSTOM:-~/.oh-my-zsh/custom}/plugins/zsh-autosuggestions
You can always add the plugins you need, listed at https://github.com/ohmyzsh/ohmyzsh/tree/master/plugins, or you can search for third-party plugins and add them.
Spaceship
Let’s configure the command line prompt. See https://spaceship-prompt.sh/getting-started/#installing for detailed instructions
We clone the code to the folder with custom themes
git clone https://github.com/spaceship-prompt/spaceship-prompt.git \
${ZSH_CUSTOM:-~/.oh-my-zsh/custom}/themes/spaceship-prompt --depth=1
Create a symbolic link
ln -s "$ZSH_CUSTOM/themes/spaceship-prompt/spaceship.zsh-theme" \
"$ZSH_CUSTOM/themes/spaceship.zsh-theme"
Add to ~/.zshrc
ZSH_THEME="spaceship"
SPACESHIP_DIR_TRUNC_REPO=false
Font
Install font
brew tap homebrew/cask-fonts
brew install font-hack-nerd-font
and use it in the terminal settings

Now we have a command line prompt in the terminal that will let you know at a glance which repository branch you’re currently on and if there are changes that need to be synced to the remote repo.
Custom terminal profile
You can choose one of the suggested terminal theme profiles - ⌘+I, I prefer the Toy Chest profile. You can get it at https://github.com/JacksonGariety/toy-chest-theme.
Download our terminal settings file — https://github.com/JacksonGariety/toy-chest-theme/blob/master/themes/Terminal/ToyChest.terminal and import it into the terminal and make it the default for all new sessions.

Now I have a terminal that suits my needs.
PS. A little extra touch to have syntax highlighting in vim. Open (create) the settings file ~/.vimrc
vim ~/.vimrc
and add the following to it
filetype plugin indent on
syntax on
As a result we have syntax highlighting in vim.
