Adding a static IP address to Multipass virtual machines on macOS
This guide contains a detailed description of how to add a static IP address to a Multipass virtual machine on macOS. A general description of how to do this can be found in the official documentation in the Configure static IPs section, however on macOS without certain modifications it is not possible to follow these recommendations.
Adding IP address to the first network interface of the virtual machine
Finding Multipass bridge
To access virtual machines, Multipass (on macOS) creates a bridge named bridge100. This bridge is used to provide virtual machines with access to the host network. IP addresses are assigned via DHCP, and when a virtual machine is (re)created, it is assigned the next available IP address from the bridge network.
Running the multipass networks command should show you a list of available network interfaces.

As you can see in this list, our bridge is not there. The result of multipass networks confirms the main limitation of Multipass on macOS: it “sees” only physical network adapters (Wi-Fi, Ethernet, USB). Created virtual bridges (bridge100) are ignored because they do not have the hardware profile that the Apple virtualization driver expects.
Let’s try to find the bridge another way.
# Find bridge (usually bridge100)
ifconfig | grep -A 2 "^bridge"
The response should be similar to the following:
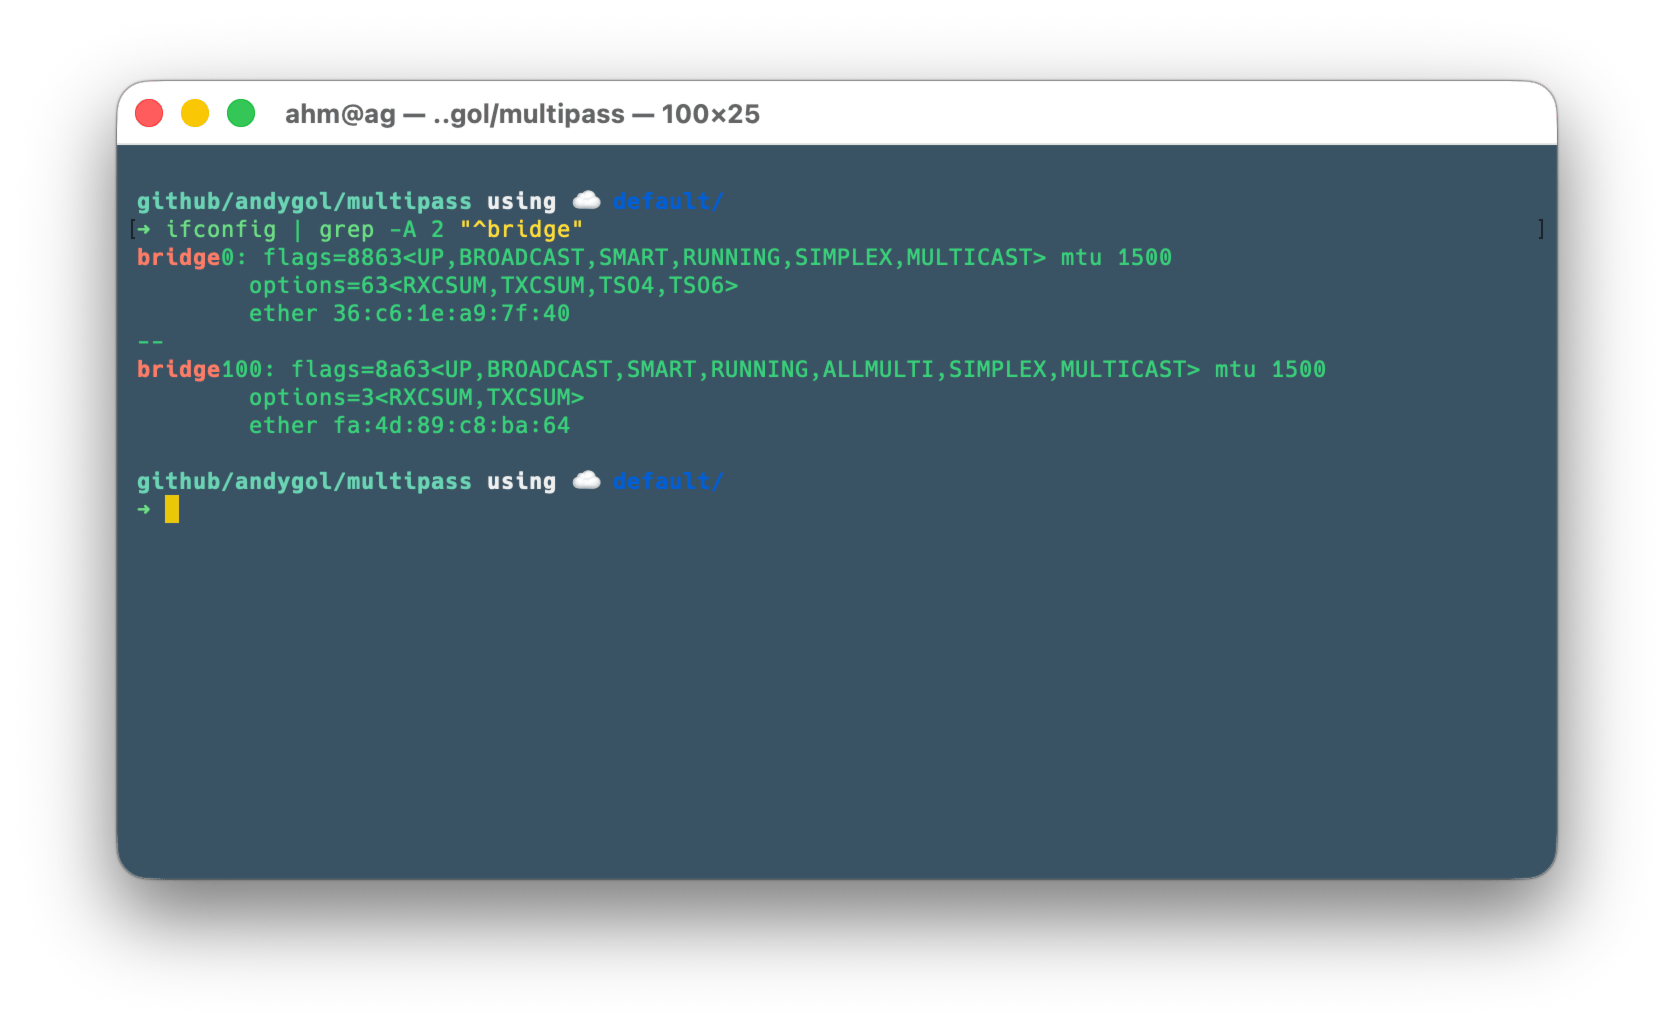
Remember the bridge name (for example, bridge100). We will use it further.
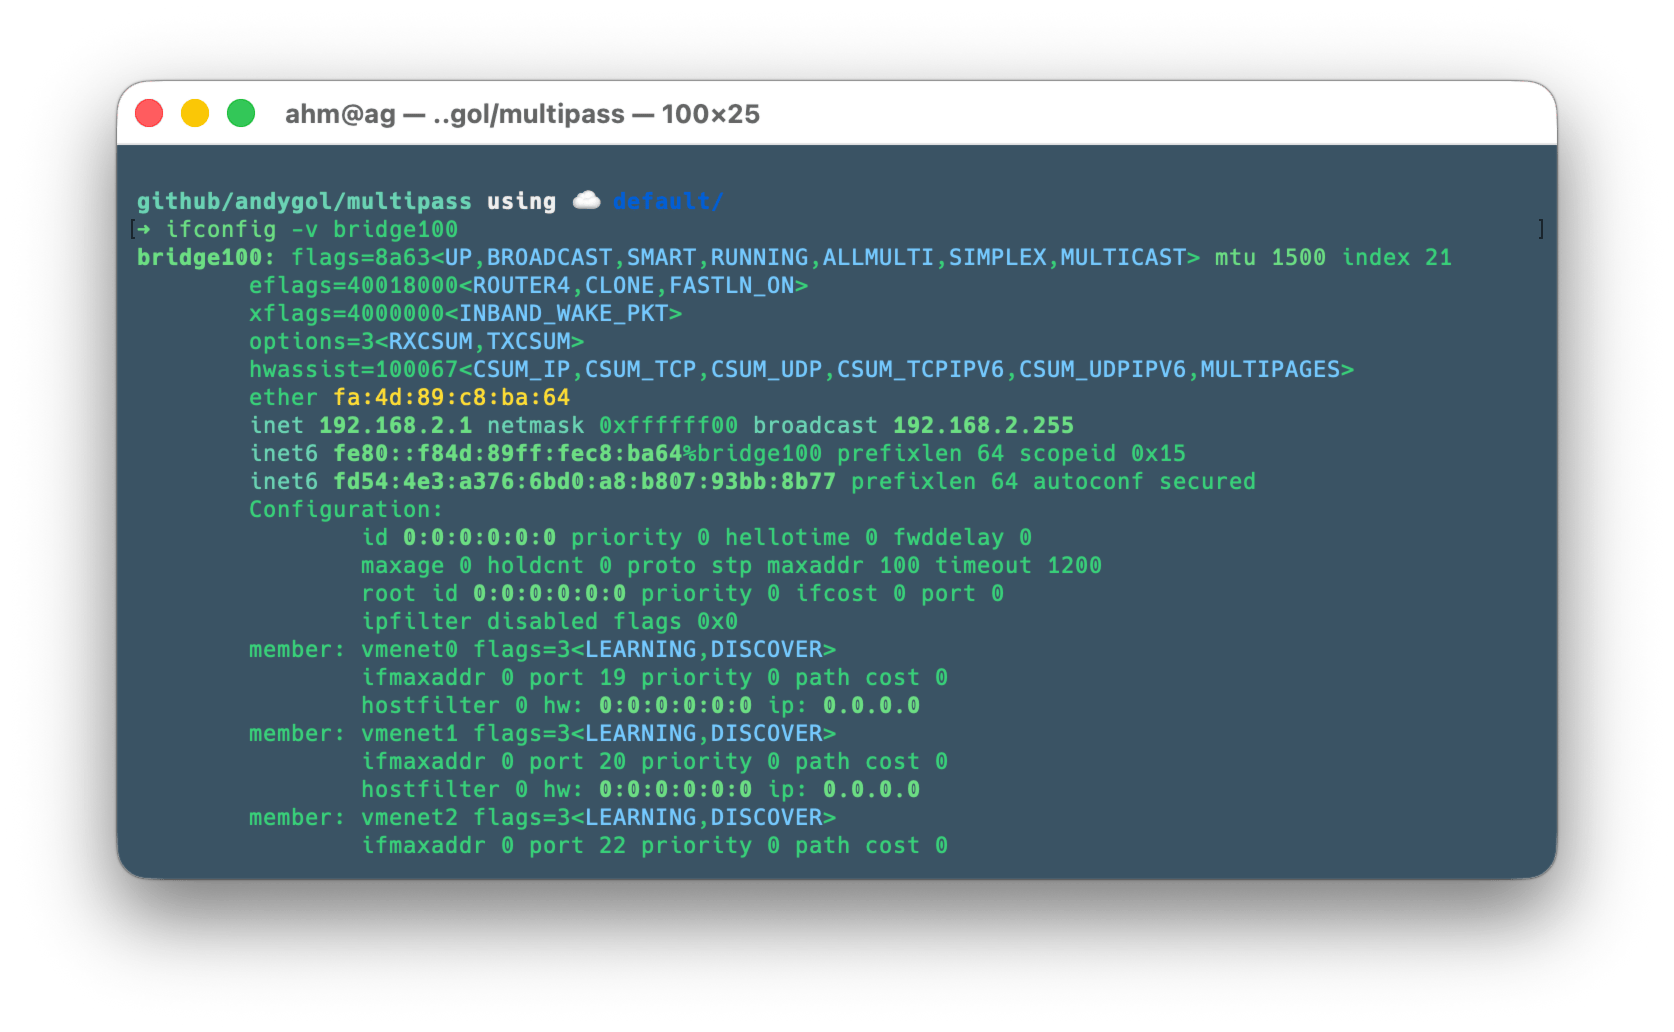
In my case, the bridge is available at address 192.168.2.1/24 and the DHCP server allocates addresses to virtual machines from the range 192.168.2.X.
ifconfig -v bridge100
Configuring bridge on the host
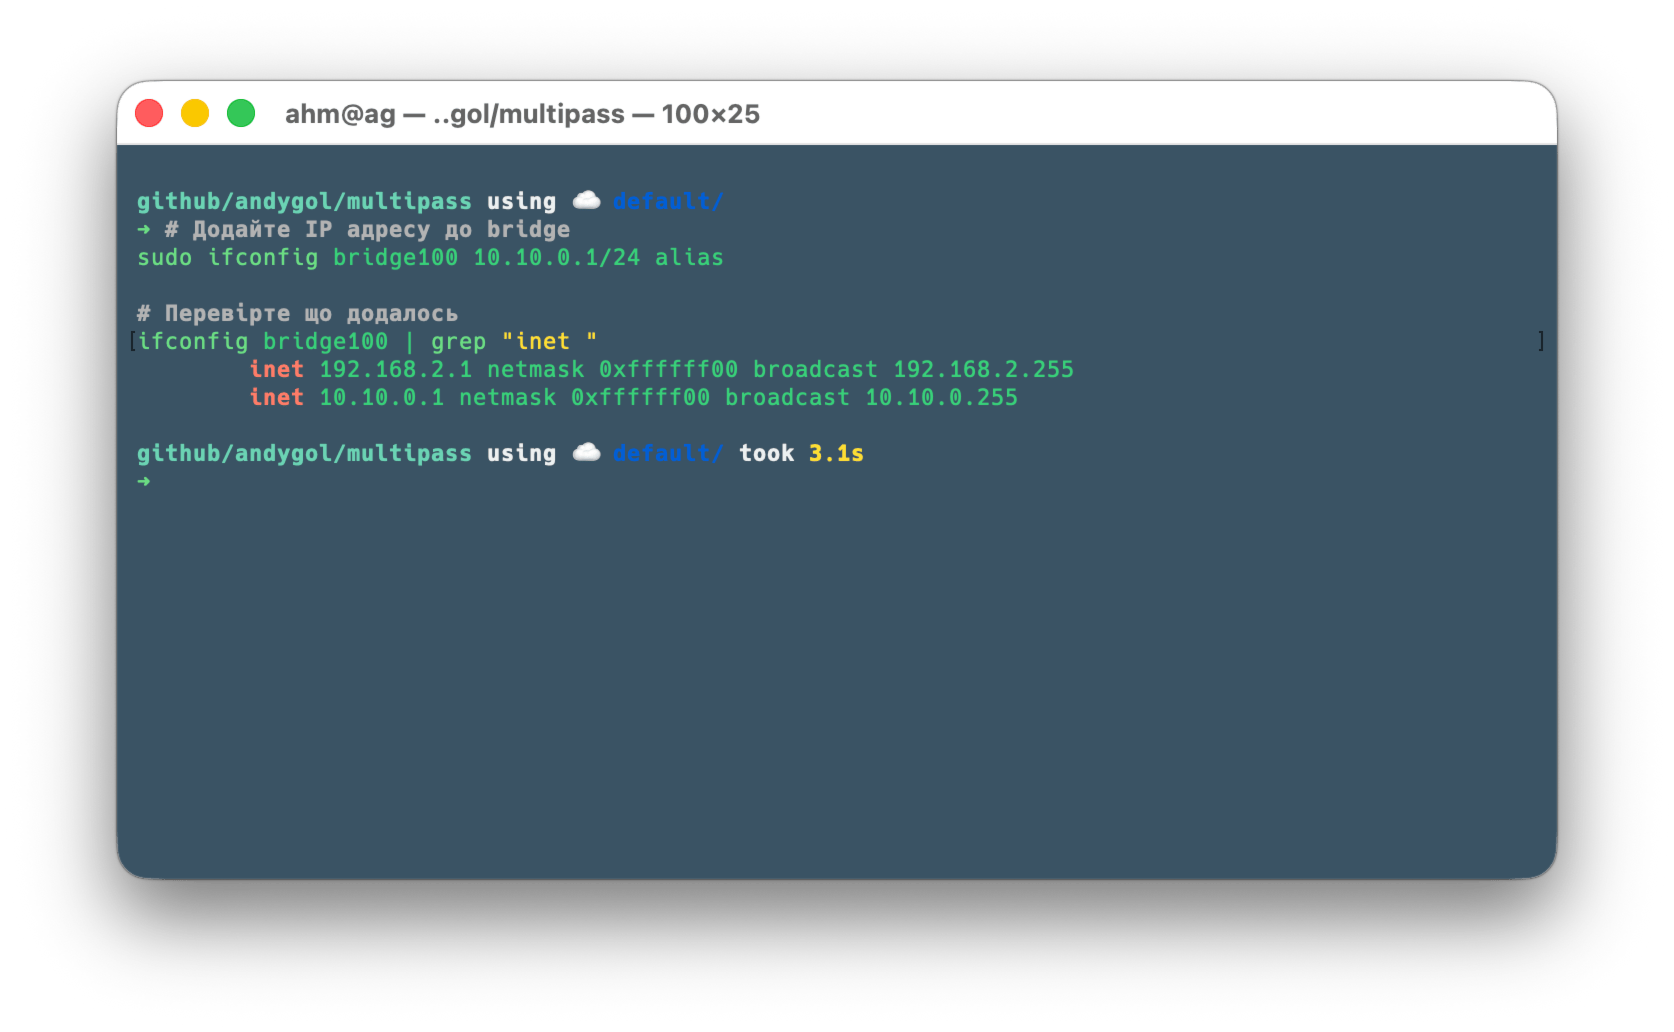
Assume that we need to provide virtual machines with static IP addresses for the network 10.10.0.0/24. For this, we will create an alias to our existing bridge.
# Add IP address to bridge
sudo ifconfig bridge100 10.10.0.1/24 alias

# Check that it was added
ifconfig bridge100 | grep "inet "
Expected result:
inet 192.168.2.1 netmask 0xffffff00 broadcast 192.168.2.255
inet 10.10.0.1 netmask 0xffffff00 broadcast 10.10.0.255
or using a script
TARGET_BRIDGE=$(ifconfig -v | grep -B 20 "member: vmenet" | grep "bridge" | awk -F: '{print $1}' | head -n 1)

if [ -z "$TARGET_BRIDGE" ]; then
    echo "Error: bridge not found. Check if VM is running."
else
    echo "VM found on $TARGET_BRIDGE. Assigning 10.10.0.1..."
    sudo ifconfig $TARGET_BRIDGE 10.10.0.1/24 alias
fi
Creating cloud-init configuration for VM
Let’s create the following cloud-init configuration file that contains settings for the network 10.10.0.0/24
cat > multipass-static-ip.yaml << 'EOF'
#cloud-config

write_files:
  - path: /etc/netplan/60-static-ip.yaml
    permissions: '0600'
    content: |
      network:
        version: 2
        ethernets:
          default:
            dhcp4: true
            addresses:
              - 10.10.0.10/24
            routes:
              - to: default
                via: 10.10.0.1
                metric: 200

runcmd:
  - netplan apply

hostname: test-vm
EOF
To configure the network in Ubuntu, we use Netplan. We add the settings for it to the file /etc/netplan/60-static-ip.yaml. The file contents are located in the content: field. Note the line permissions: '0600', which sets read-write permissions for the root user only. If the permissions are too permissive, Netplan will notify you and will not apply the settings. The netplan apply command applies the settings from the /etc/netplan/ folder. The hostname field contains the name for our virtual machine, which will be added to the /etc/hostname file.
Launching VM and checking operation
Let’s create our virtual machine
# Create VM with cloud-init configuration
multipass launch --name test-vm --cloud-init multipass-static-ip.yaml
Multipass will create a virtual machine with the name specified in the --name/-n parameter and will use the cloud-init settings from the file specified in --cloud-init.
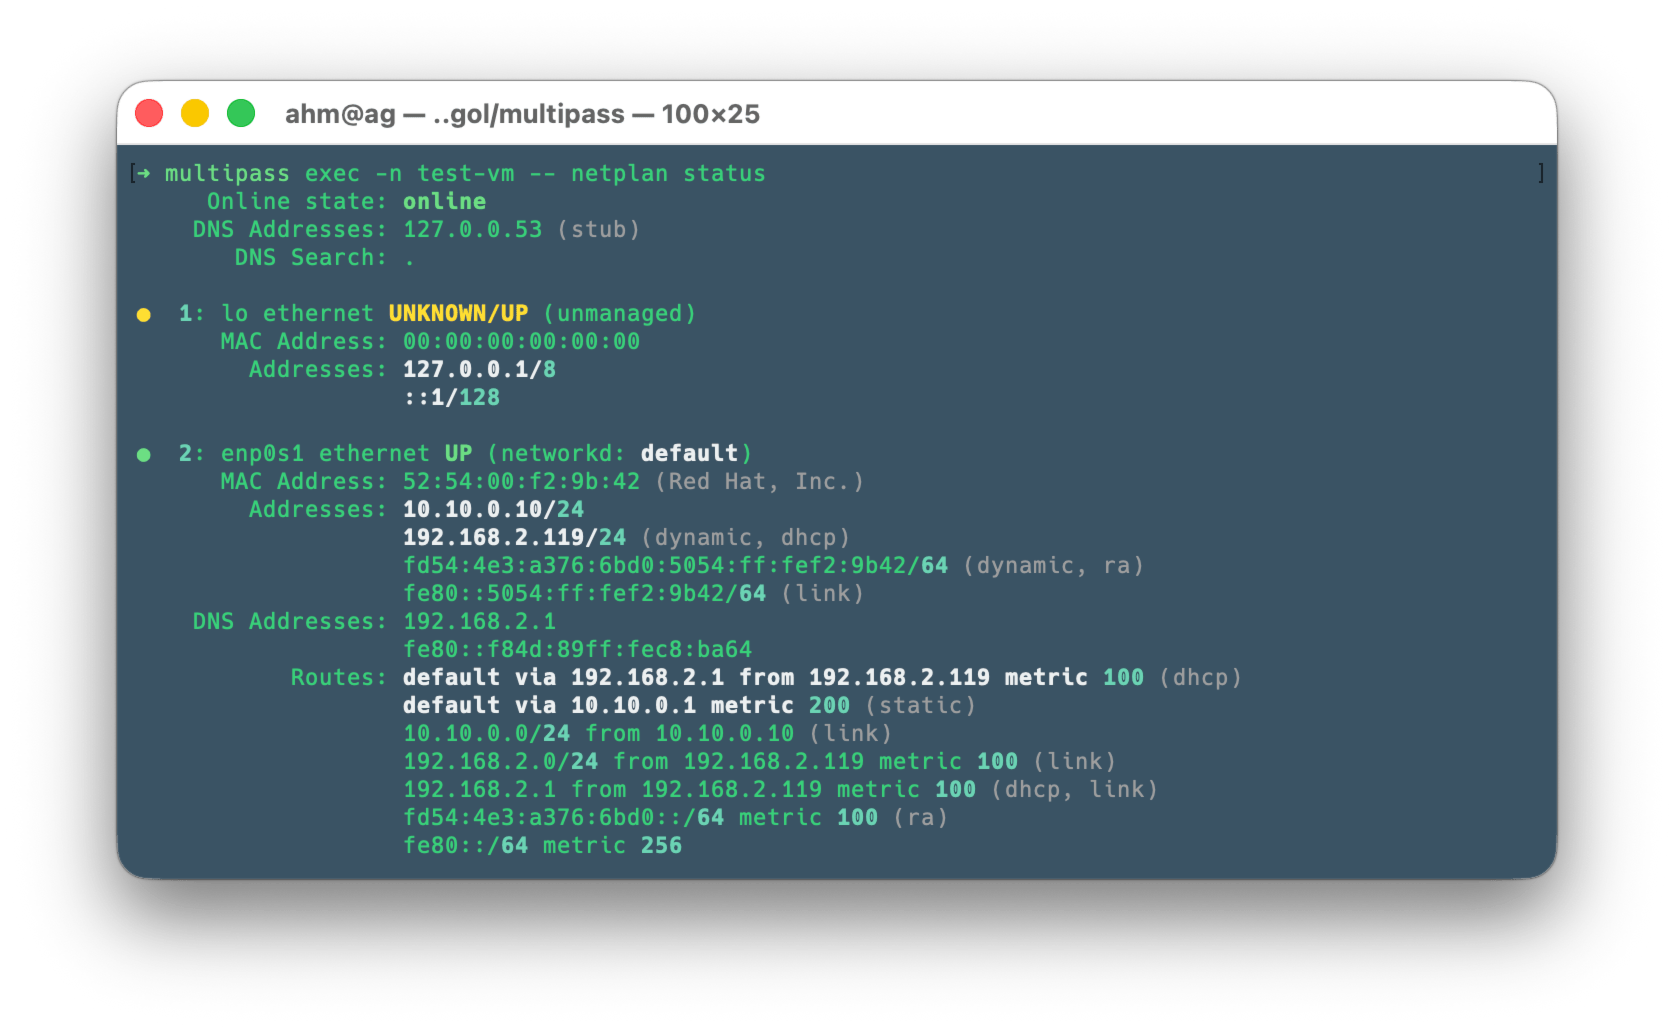
Let’s check the network settings of our virtual machine
# Check IP addresses on VM
multipass exec -n test-vm -- ip addr show enp0s1

# or use netplan
multipass exec -n test-vm -- netplan status

# Should show two IPs:
# - 192.168.2.x (DHCP)
# - 10.10.0.10 (static)
Now it’s time to check the connection
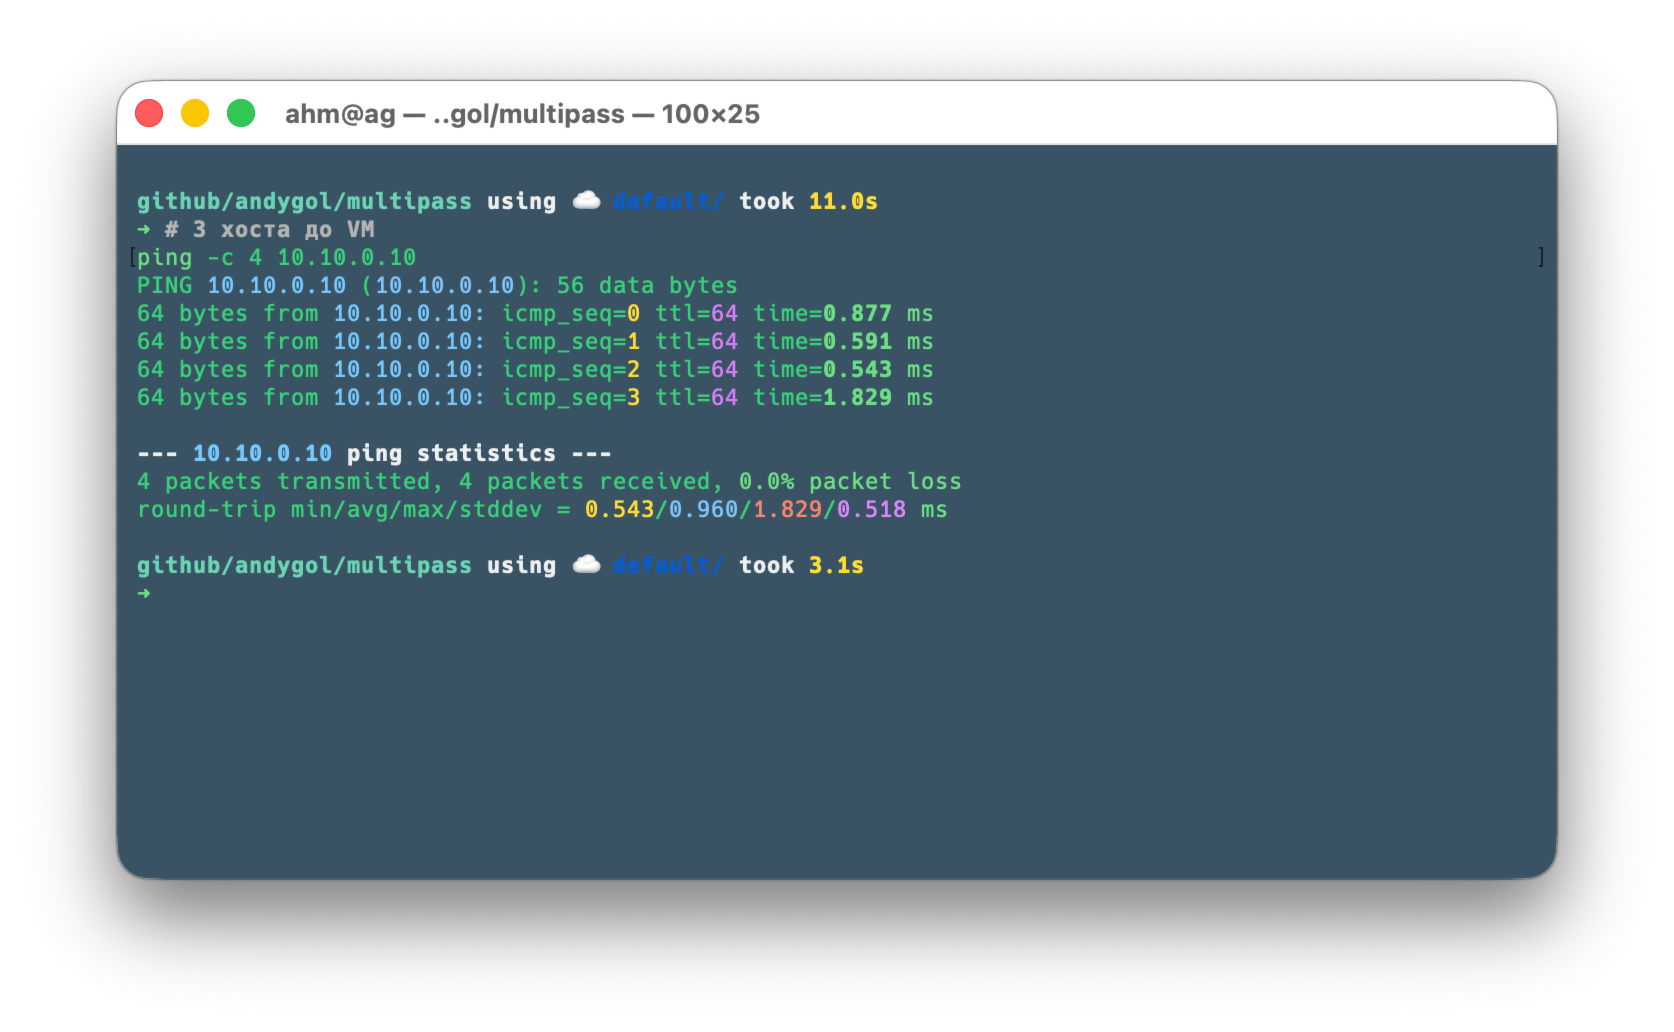
# From host to VM
ping -c 4 10.10.0.10
# From VM to host
multipass exec -n test-vm -- ping -c 4 10.10.0.1

# Check internet access from VM
multipass exec -n test-vm -- ping -c 4 8.8.8.8
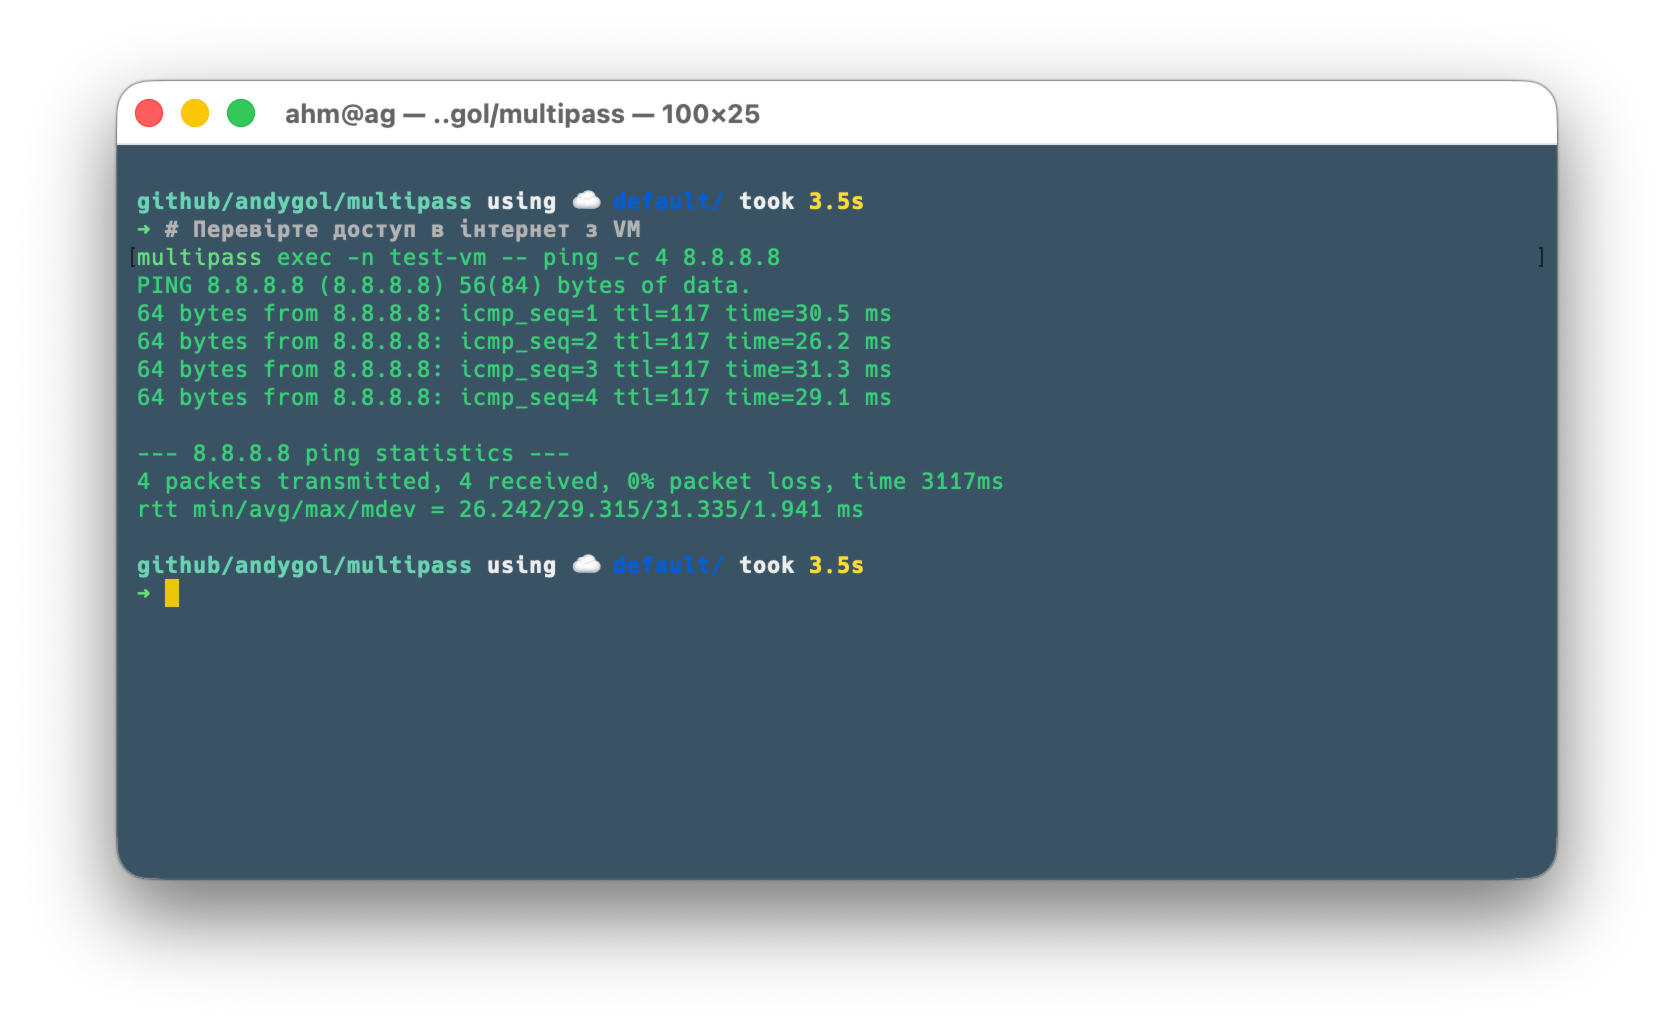
✅ Static IP address works!
Technical details
# Output list of configuration files
multipass exec -n test-vm -- sudo ls -la /etc/netplan

# Get merged network configuration
multipass exec -n test-vm -- sudo netplan get
We see that in the /etc/netplan directory there are files 50-cloud-init.yaml, which is created by cloud-init during virtual machine initialization, and the file 60-static-ip.yaml, which we passed in the settings.
Running the sudo netplan get command will give us the merged network configuration. Compare it with the content of the 50-cloud-init.yaml file.
# Get content of 50-cloud-init.yaml
multipass exec -n test-vm -- sudo cat /etc/netplan/50-cloud-init.yaml
Pay attention to the name of the network interface that cloud-init uses. This is the one we used in our settings (not enp0s1).
network:
  version: 2
  ethernets:
    default: # network interface name
      match:
        macaddress: "52:54:00:ae:24:22"
      dhcp-identifier: "mac"
      dhcp4: true
Adding static IP address to the second network interface of the virtual machine
In addition to adding a static IP address to the first network interface, we can do this for other network interfaces of the virtual machine. For this, on the host, you need to add/create the corresponding network bridge.
Multipass bridge for the second network interface
Let’s launch a temporary VM to create a new bridge (bridge101)
multipass launch --name sandbox-vm --network name=en0,mode=manual
The parameter --network name=en0,mode=manual will create a new network interface enp0s2 in the virtual machine, which will be bound to a new bridge. However, after creation, this interface will be inactive because no IP address was assigned to it.
The (dis)advantage of this approach is that after deleting all virtual machines bound to this bridge, it will be automatically removed from the system. It exists as long as there are virtual machines bound to it.
This command allows you to find the name of this bridge:
ifconfig -v | grep -B 20 "member: vmenet" | grep "bridge" | awk -F: '{print $1}' | tail -n 1
Most likely the name will be bridge101.
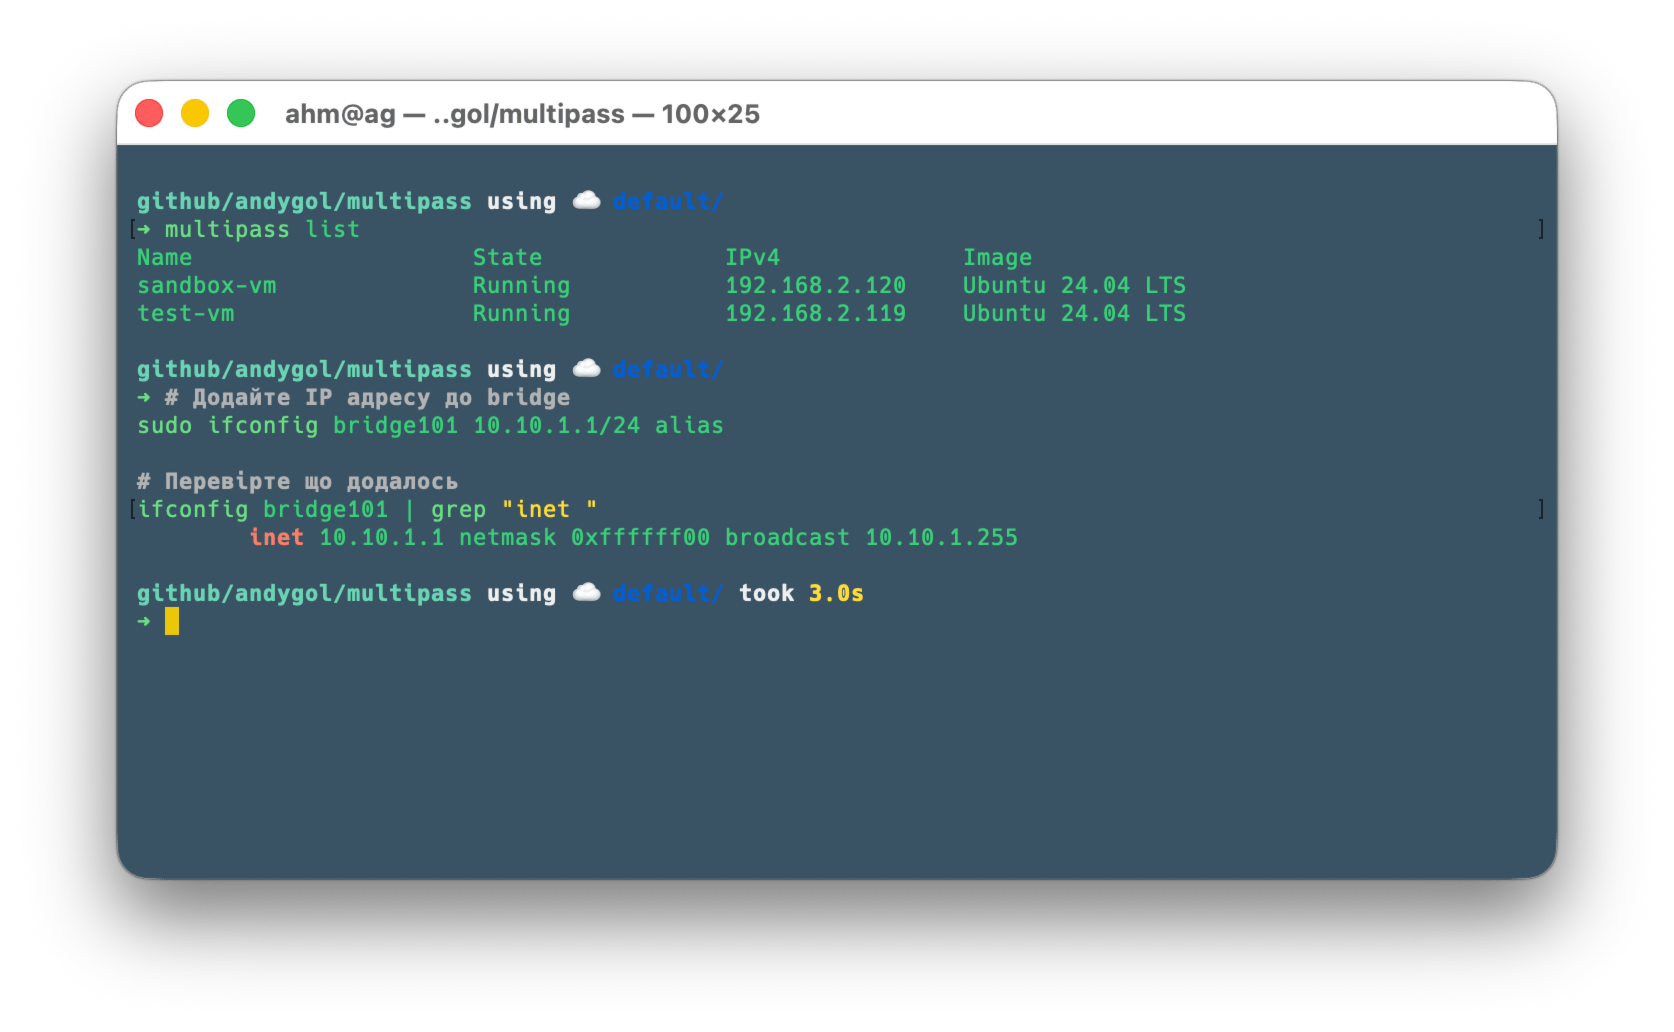
Let’s add an alias to the bridge
# Add IP address to bridge
sudo ifconfig bridge101 10.10.1.1/24 alias

# Check that it was added
ifconfig bridge101 | grep "inet "
Expected result:
inet 10.10.1.1 netmask 0xffffff00 broadcast 10.10.1.255
or
TARGET_BRIDGE=$(ifconfig -v | grep -B 20 "member: vmenet" | grep "bridge" | awk -F: '{print $1}' | tail -n 1)

if [ -z "$TARGET_BRIDGE" ]; then
    echo "Error: bridge not found. Check if VM is running."
else
    echo "VM found on $TARGET_BRIDGE. Assigning 10.10.1.1..."
    sudo ifconfig $TARGET_BRIDGE 10.10.1.1/24 alias
fi
Creating cloud-init configuration for the second network interface VM
Just like in the first case, let’s create a cloud-init configuration for setting up the virtual machine’s network interface.
cat > multipass-static-ip1.yaml << 'EOF'
#cloud-config

write_files:
  - path: /etc/netplan/60-custom-network.yaml
    permissions: '0600'
    content: |
      network:
        version: 2
        ethernets:
          enp0s2:
            addresses:
              - 10.10.1.20/24
            # WE REMOVE "via: 10.10.0.1" (default gateway)
            # Instead, we just allow direct access to the 10.10.1.0/24 network
            routes:
              - to: 10.10.1.0/24
                scope: link
runcmd:
  - netplan apply
EOF
Launching and checking the virtual machine operation
Let’s launch a virtual machine named test-vm1.
# Create a VM with cloud-init configuration
multipass launch --name test-vm1 --network name=en0,mode=manual --cloud-init multipass-static-ip1.yaml
Wait for the VM creation and launch process to complete. After that, we can delete our temporary virtual machine, which we used to have the system create a new network bridge.
multipass delete sandbox-vm --purge
Creating the test-vm1 virtual machine is the same as creating test-vm, with the difference that it will have two network interfaces.
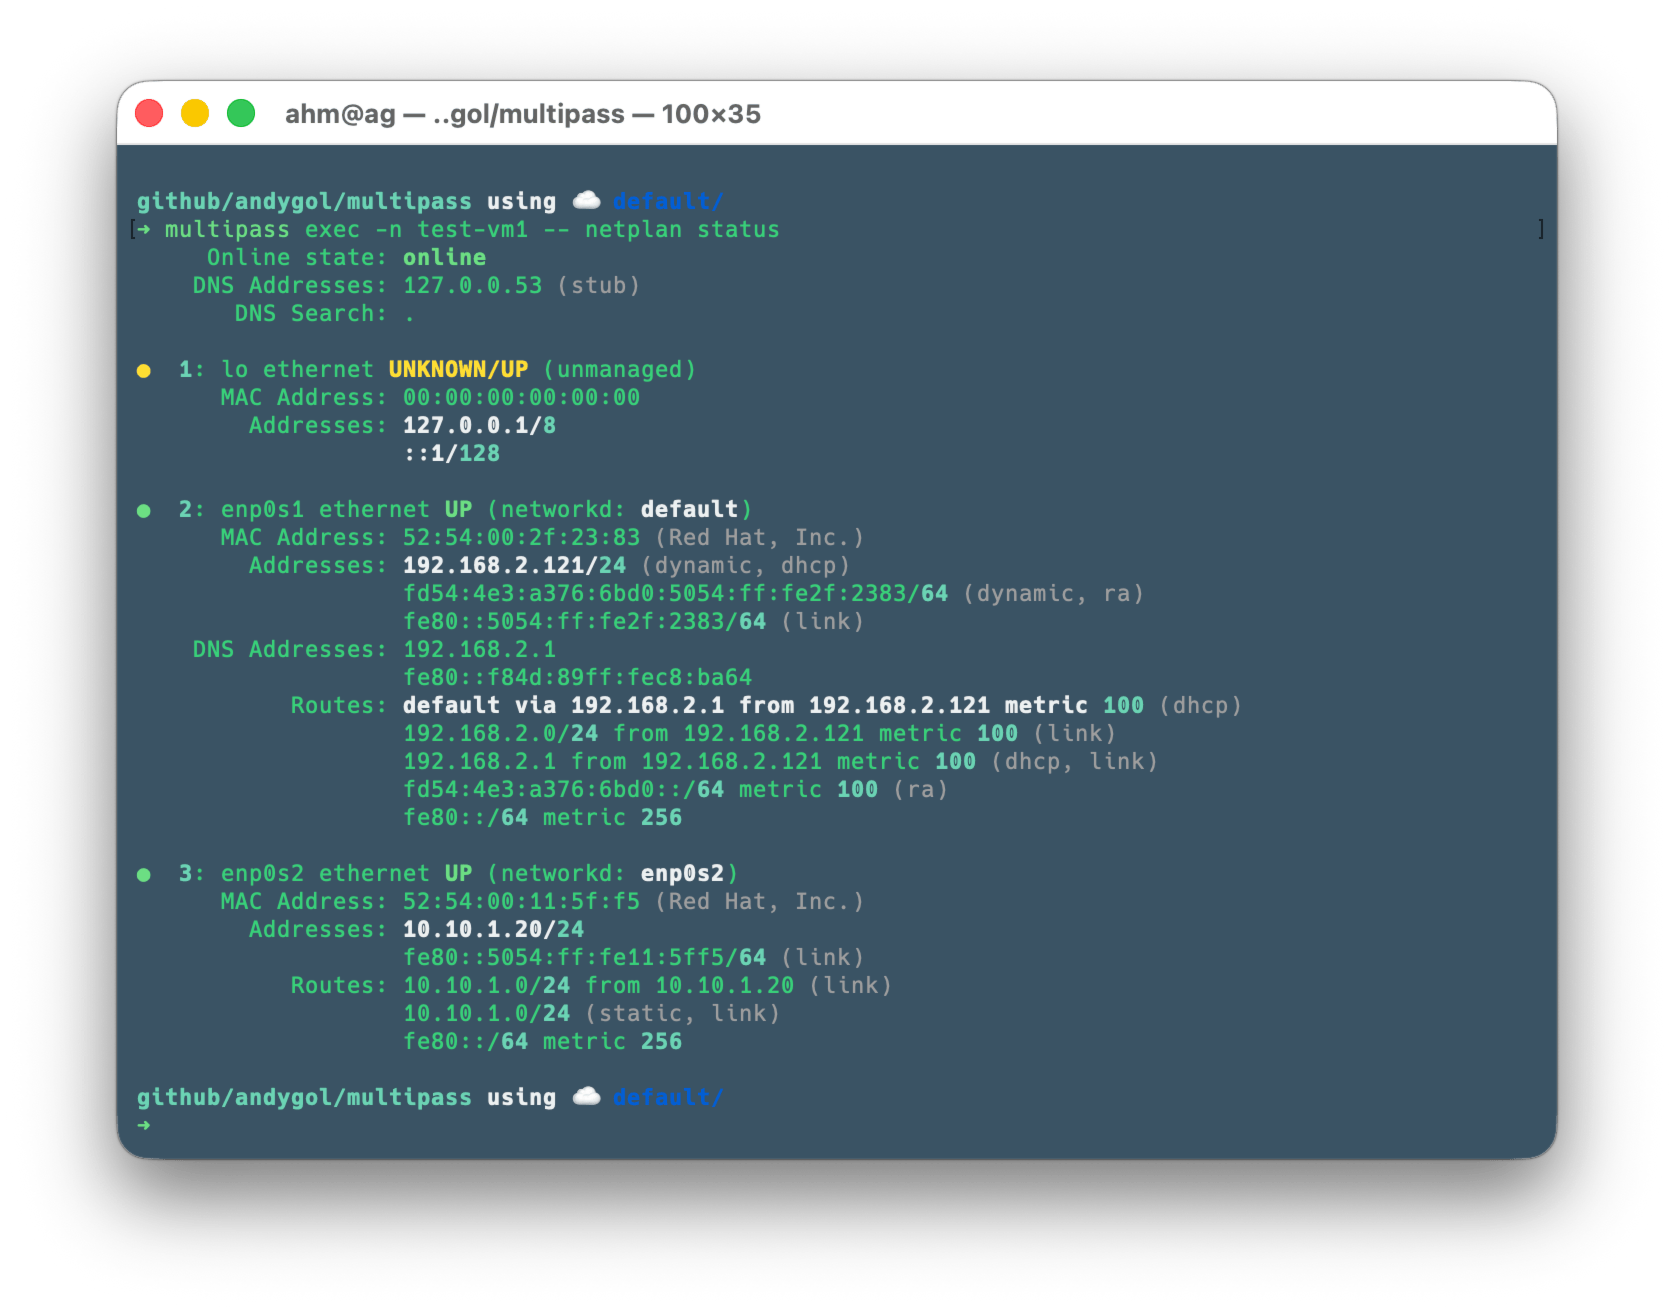
Now let’s check the virtual machine’s network interface settings
# Check the IP addresses on the VM
multipass exec -n test-vm1 -- ip addr show

# or use netplan
multipass exec -n test-vm1 -- netplan status
You should see two IPs:
- 192.168.2.x (DHCP) on enp0s1
- 10.10.1.20 (static) on enp0s2
Let’s check the connection
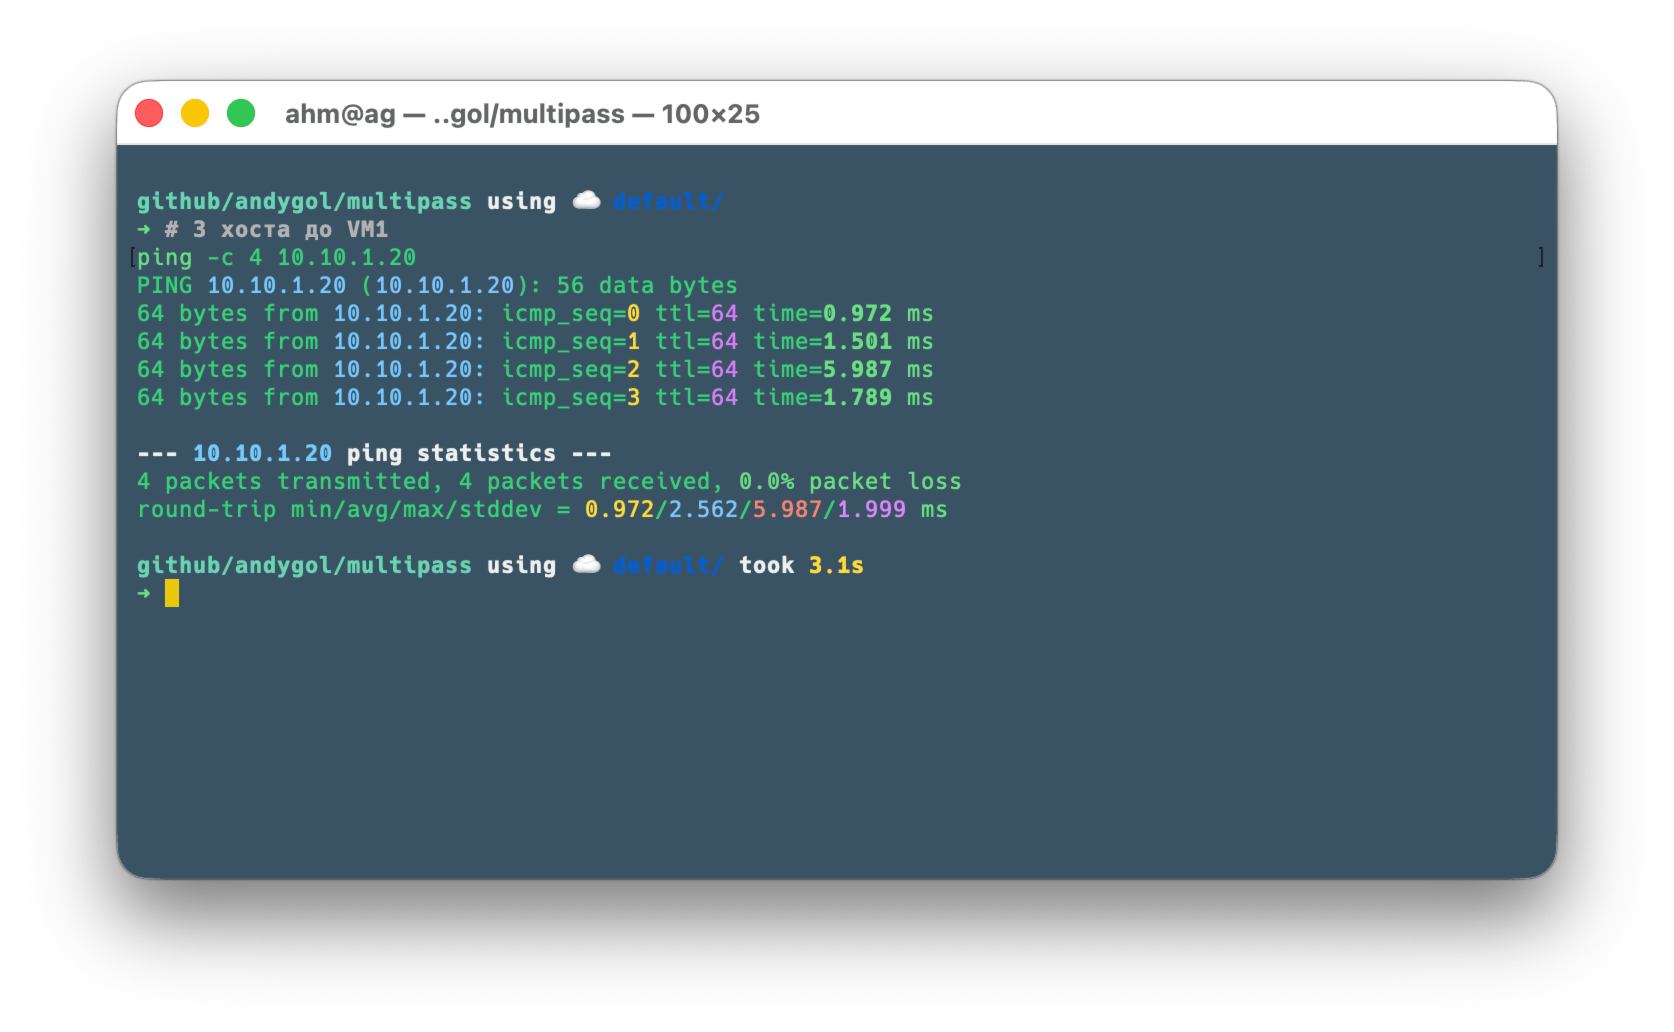
# From host to VM1
ping -c 4 10.10.1.20
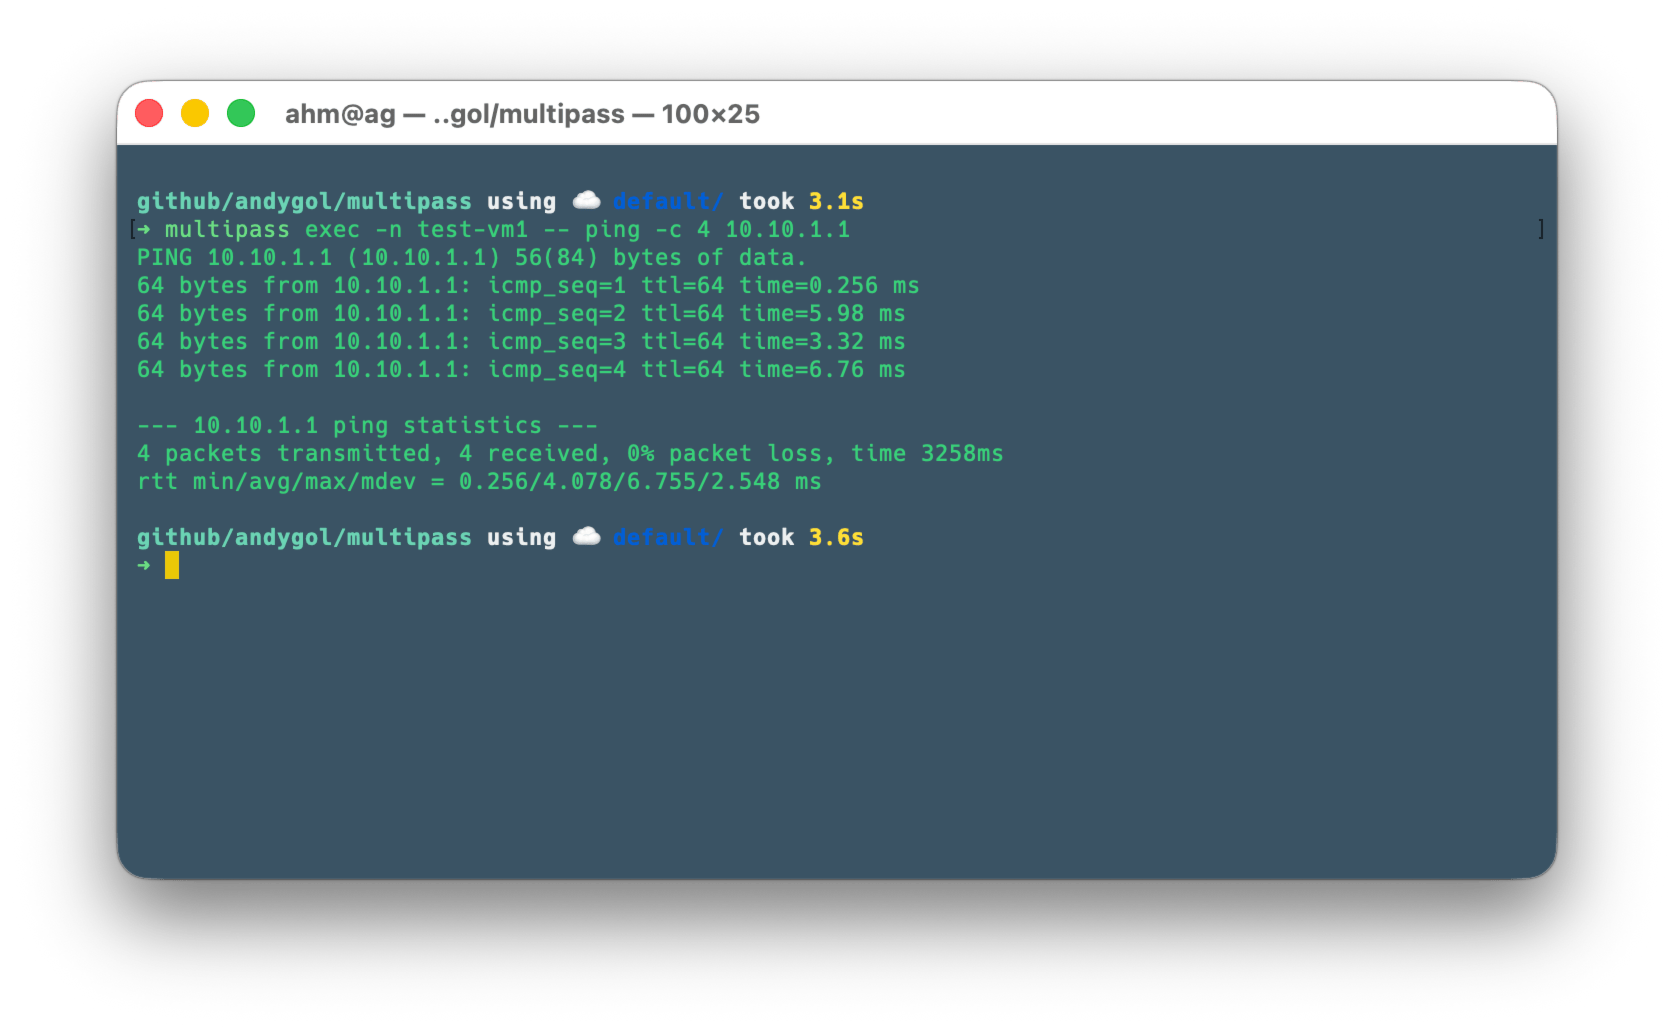
# From VM1 to host
multipass exec -n test-vm1 -- ping -c 4 10.10.1.1
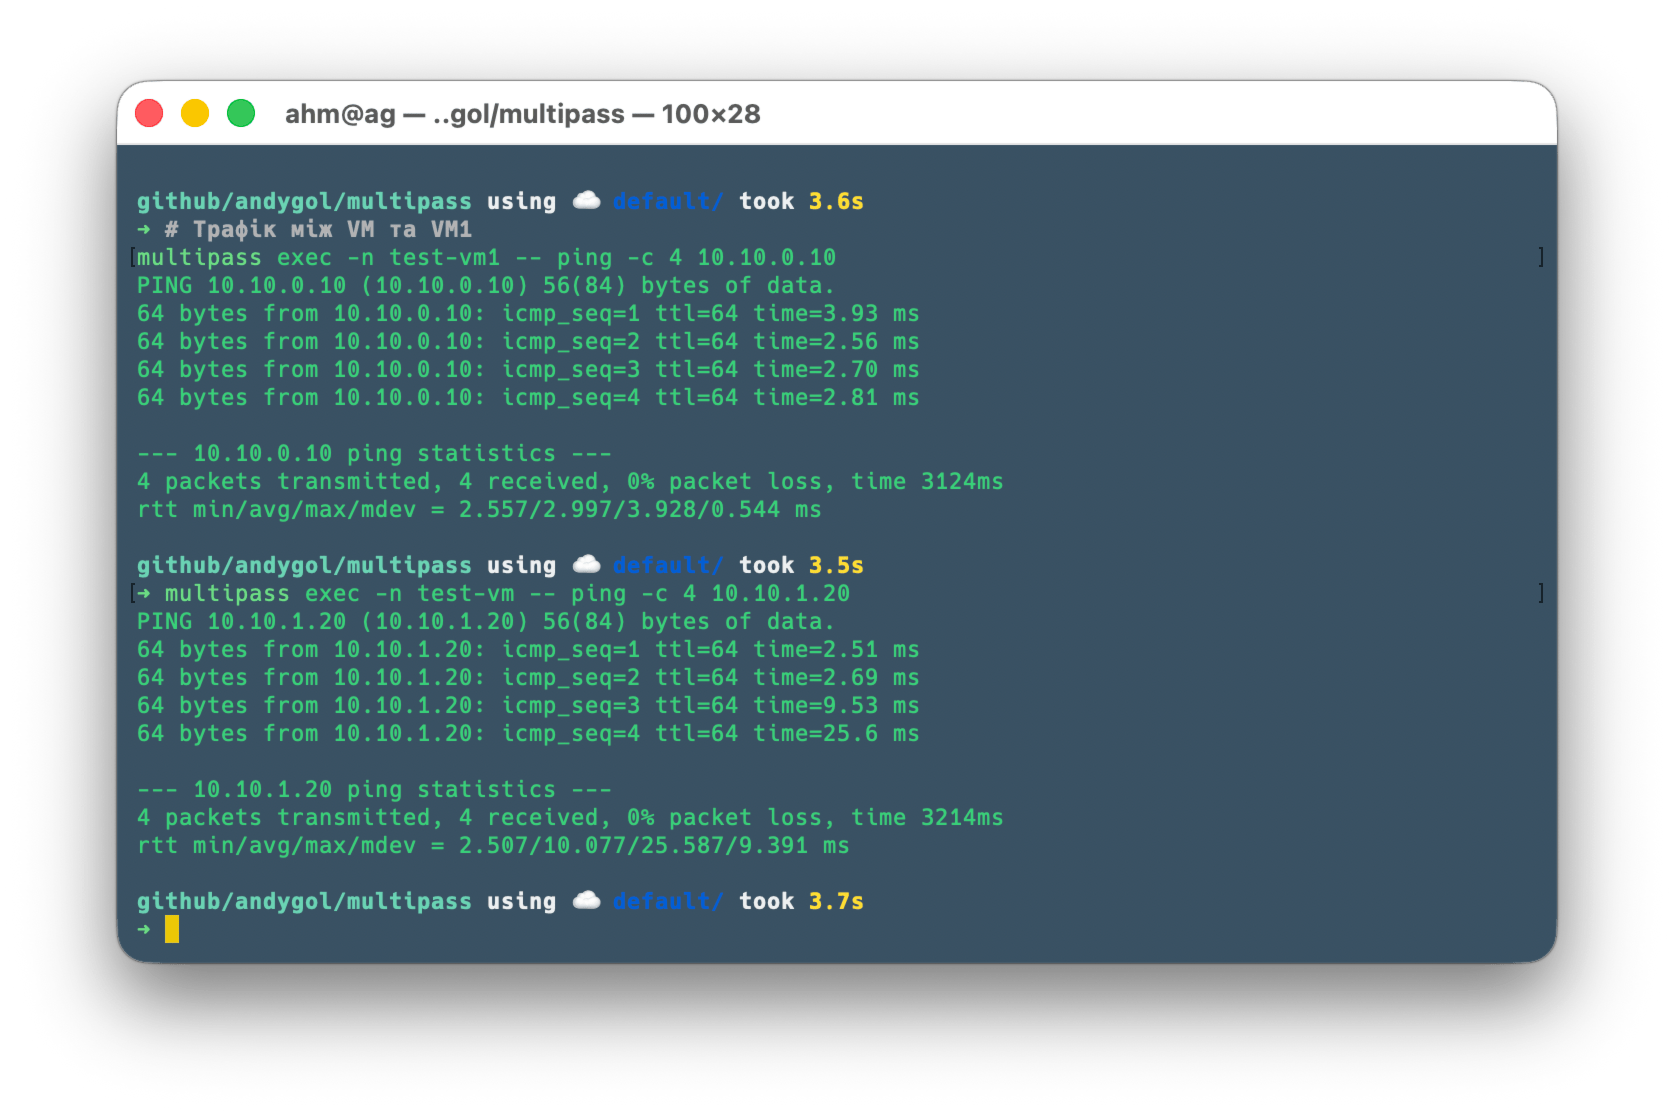
# Traffic between VM and VM1
multipass exec -n test-vm1 -- ping -c 4 10.10.0.10
multipass exec -n test-vm -- ping -c 4 10.10.1.20
# Check Internet access from VM1
multipass exec -n test-vm1 -- ping -c 4 8.8.8.8

✅ The static IP address on the second network interface is working!
Cleaning up
Delete virtual machines with the command multipass delete <name-vm> --purge or all at once with multipass delete --all --purge.
After deleting all virtual machines that were attached to the bridge101 bridge, it will be removed automatically.
The result of executing ifconfig -v bridge101 will be
ifconfig: interface bridge101 does not exist
To remove the alias from bridge100, execute sudo ifconfig bridge100 -alias 10.10.0.1. You can also clear the cache with sudo arp -d -a.
Summary
With these instructions, you can add static addresses to Multipass virtual machines. This can be useful when you need to use a pool of pre-allocated addresses.
⚠️ This guide was created and tested for macOS. Working with other operating systems may differ depending on the features and approaches you use.